Showing posts with label floral design. Show all posts

Thursday, August 23, 2012

Attention Campers Part 2


Attention Campers Part 2


At flowerflinging Camp this month, we focused on structures.  Each camper came with a structure or two to try out or with the materials to make it from scratch.  These diverse designs inspired us all!

The Nominator was making this plexiglass structure for the second time.  The curve and tension are created by tightening the burnt siena twine until you have a balanced curve.  Ha! Easier said than done. There are two rows of holes at each end of plexi and it is strung rather like a cat’s cradle.  Plexi flower tubes are also covered with the twine.  They are inserted between the interlocking twine and look like gorgeous orchid ice cream cones!  The looped lily grass adds elegance and rhythm.


The MOG brought this versatile wooden structure with a rotating panel at its center.  You could not ask for more beautiful harmonious plant material which includes anthurium, orchid, phormium calla lily, ti leaves and leucadendron.  The elegant design sweeps diagonally down the structure.


Lady S resurrected her structure that appeared in “The Fine Art of Flower Arranging” (Abrams, 2002).  Using twisted Manzanita branches and spectacular home grown lilies – (Lilium Scheherazade, an oriental trumpet lily), Lady S created a lively counterpoint to the symmetry of the structure.


A battery lantern was cleverly used as a design structure by The Editor.  She created a very flowing line design in a simplified the color scheme of yellows and green, using croton leaves and mini sunflowers, linked by variegated phormium and middolino sticks.  Middolino sticks are a very fine flexible cane and come in many colors. 


In the first ffCamp post last week, you could see this plexiglass sheet being bent with the heat gun used for paint stripping.  After making a number of graceful curves, the Grower used this as the basis for several groups of materials.  This gorgeous one combines orchids, phormium, variegated aspidistra, alligator fern, birds nest fern and small green button mums called Kermit.  The placement of the flowers echos the waves of the structure.   

Thanks to The Editor for the photographs......Still more camp to come....stay tuned!  
Cheers!


Thursday, August 16, 2012

flowerflinging Camp

Attention Campers!

2012 flowerflinging Camp


Structures was the theme of the third annual flowerflinging Camp held at The Barns this month.  Six friends, GCA judges all, came to the Berkshires for  flowerflinging, fun, friendship and food.


As in every good camp, we had a library where we shared our favorite design books and magazines.


A photo studio to record the fun.


ffCamp is about sharing techniques, skills and experiences.  Usually no single person is the teacher.


We worked with paper, plexiglass and wire, with sticks and frames and even repurposed lanterns.


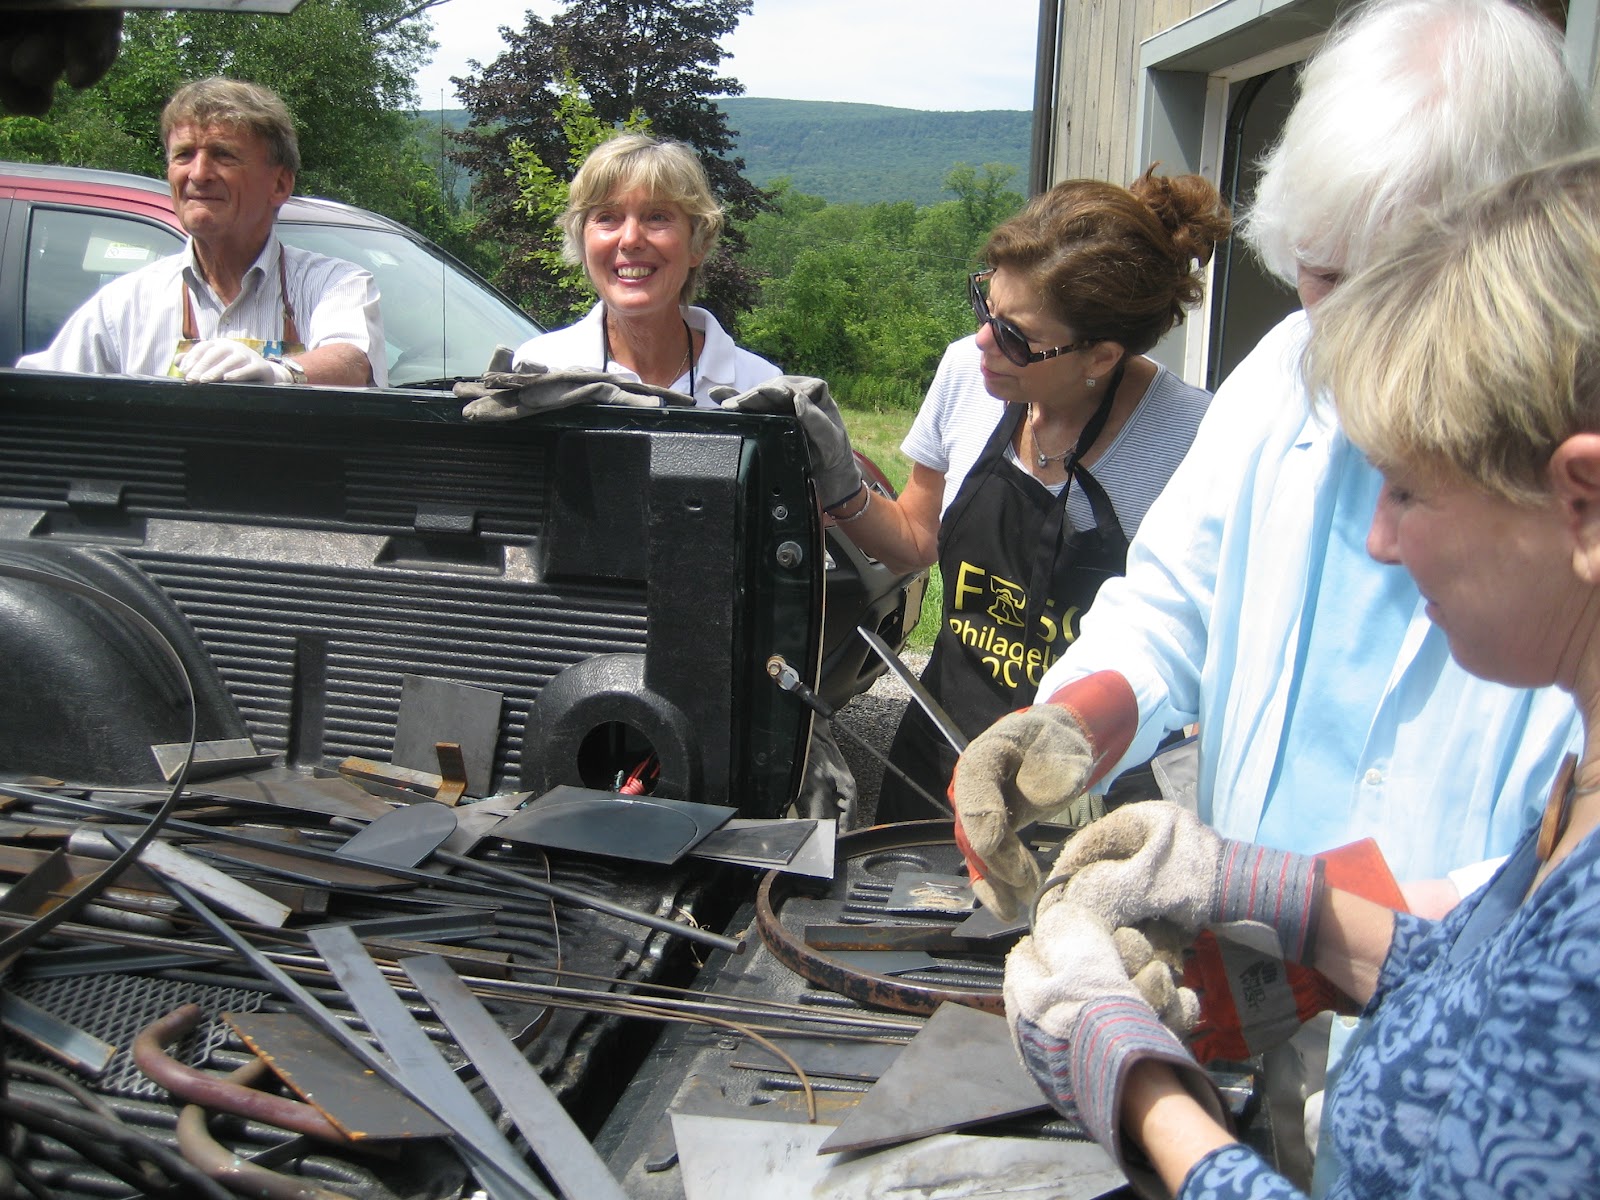
Most fun of all was when we did have a visiting teacher, The Master Welder and Mrs. Welder, along with Mr. GCA as sous-welder.


The Master Welder came with his traveling equipment and a truck bed of metal scraps of every kind, plus welding 'masks' for each of us!  


 We were delighted to choose scraps and have them fashioned into stands, containers and sculptures. A drawer in the garage yielded enough gloves for all to us - the scraps are sharp!


Judges Commendation to, left, Mr. GCA and right, The Master Welder, "for unlimited patience and great good humor with the campers".  You can see the great variety of structures created at ffCamp. Those interested in welding should read the chapter by Margo Paddock in The Fine Art of Flower Arranging by Nancy D'Oench, Abrams, 2002.  

Thanks to Mrs. Welder for the photographs. To be continued -- with the completed designs and tips…..

Cheers!

Monday, August 13, 2012

O Girasole...


Sunflowers by any name – girasole, tournesol, or himawari - may not smell sweet as the saying (kinda) goes, but they always make us smile.  Here in the hills between Lakeville and Sharon CT, two huge fields have been blooming away, transporting us to Provence or Kansas, depending on your worldview.


Googling sunflowers, you will find over 40 varieties of Helianthus annus in yellows, reds and bronze, providing much grist for the designer’s mill.

A gentle subscriber in Rochester gave me these fabulous red milk bottles (see "Summer Marches Down the Table", June).  What a fun and easy setting they make for these cheery faces.

For a small dinner, this is a quieter version with tapered square glass containers sitting on square mirrors with candles. I am not a huge fan of colored candles but the white does look rather lame here.


With bronze sunflowers a more dramatic, if less summery, statement can be made.  This handsome piece of pottery was created by Michael Humphreys.  It is a striking piece even on its own and a very versatile container.


Added to the pot-et-fleur box used last week (see "When Pot meets Fleur", July), these yellow centered sunflowers create a sunshine in a box.  They are sitting in a water filled container which has been placed in back of the potted plants.

For something really different, a piece of garden art is brought to the table.  The sunflowers are stripped of their bright petals.  This is very sticky work so slather your hands with hand cream so the sap doesn't stick or use disposable gloves.  The less freshly picked the sunflowers are, the easier it is to remove the petals - a gentle back and forth at their base and then slip about 4-6 petals at a time.

Sunflower stems are cut very very short, with skewers used to help hold them into the oasis. Only a little of the stem needs to be in the oasis to keep them hydrated.  Above, you can just see the leaf covered tuna can that raises this design up as it sits in the sculpture.


Lily grass is used to emulate the iron.  The tough end is poked into the oasis, and the softer tip is looped over and pinned to the oasis between the flower heads.  


First, find your sunflower!  Cheers!

Sunday, July 29, 2012

The vase stands alone....


The vase stands alone


Sometimes the vase tells the whole story….


Sometimes the vase is prettier than the flowers.  It may not be a vase at all, but an imaginative piece begging to be a vase.  Here is a piece of cherry wood crafted in the North Carolina Highlands containing dried nigella pods (love-in-a-mist) and oregano flowers.


This charming fish plate, sauceboat and ladle tell a great story.  The ruby cockscomb in the sauceboat lends a velvety texture to the glossy china.  These ceramics are from Portugal, though the motif looks very Asian, like a big fat carp.


A stunning piece, the porcelain basket exudes a rough texture and very Armani-like color scheme of tans, taupe and gray.  The orderly, pristine white ranunculus play off the craggy openings in the basket which create a great rhythm from the hands of a master potter.


This cylinder has an almost Prussian blue specked glaze over a mustard brown. Above a dense band of blue in the middle, a fascinating ring of texture winds up to the opening.  This ceramic doesn’t attract attention until it is graced by the lyrical clematis branch.  


My favorite of Mimi’s favorites, this Spode cache-pot shimmers with vibrantly colored transferware  flowers in rich deep colors.  The picotee  carnations are custard colored with a burgundy edge picking up the tones of the container.  Though the carnations may be a little busy for the ceramic, I was drawn to their old fashioned quality  with the bold, almost Victorian design. 


Look around your house and let the vase do the work for a change.

Cheers!


Thursday, July 19, 2012

Anatomy of a design


Pediment/Pentimento

 the flower show:  Loyalist Legacy

Class 1 Pediment/Pentimento                          4 Entries 

A design staged on a fluted pedestal 42” high with a 14” square top. Design not to exceed 14” from center of pedestal top on either side. Viewed from all sides.


An often asked question is, "where do your ideas come from?"  In this case, I began with the dictionary.  The alliterative class title contrasted two kinds of forms: pediment, the geometric triangle of classical buildings and pentimento, which, in one meaning, means delicate interlacing of lines.  This contrast of form of the solid and airy would be the basis of my design.

Materials: 
a sheet of oasis glued to Styrofoam (bought this years ago at a workshop and despaired of ever using it - haven't seen it for sale elsewhere, but also haven't looked) 

1/2" wooden dowel

oval wooden 'plaque' (Michael's)


Styrofoam/oasis is 3.5" thick.
Cut dowel, screwed into the base.  


Wanting to avoid a predictable, horizontal triangle, I shaped it vertically,  deconstructing it from a pediment to a vertical triangle.  The dowel is jammed into point of the triangle so it stands upright.  

I found the resulting top, which was straight across rather less than dynamic, so I added another smaller triangle (top, right) – this creates more interest, and takes the concept further from a literal idea.  The long edge of this topmost piece becomes the hydrated oasis.  

 The rather odd cut, barely seen in the top oasis, separates the part that is actually hydrated from the rest of the oasis on the form, and becomes the water source for plant material. 


The plant material chosen would be lacey and open, suggesting a kind of tracery.


Plant materials are:

Aspidistra - long leaves used to cover triangle
Jasmine - lacy pink & white vines
Clematis - both large white & smaller pink 
Nigella pods - love-in-a-mist pods color of clematis centers


The day before the show I bought my plant materials and conditioned them thoroughly, or thought I did.  I took a first time chance on using the clematis as the show was only up for one day. In the end, they didn't fare very well....


Five bunches of Aspidistra leaves are used to upholster the form.  This was the only part I practiced – several times – trying for as ‘clean’ a form as I could get.
  
This was my first attempt (right). I used the side 'seam' of the structure to line up the pinned leaves (see below also) and let them overlap each other on the front surface.  The hardware store yields a plethora of interesting pins/nails to be used in modern designs.  The secret is that their use needs to make sense from a design point of view and to use them precisely, otherwise they become a distraction. However....


As preciseness is not quite in my skill set, I decided on another method which would hide any pins I needed to do the job.  Because the aspidistra leaves have a stiff spine, I separated the leaves  (right of picture) down the spine.  They have a fat half and a narrower half (left).  Discard the spine.


Starting at the top of the triangle overlap a leaf from left and from right to cover the shape (left, above).  Once you are about a third of the way – descending –  one leaf half will fit from side to side.  I didn’t worry about the sides of the structure and their pins looking neat but just  kept the tacks close to the middle.   Once both the front surfaces were all covered, for the sides of the structure, put double stick carpet tape (Scotch brand)  on the back of whole leaves (removing the spine where it starts to thicken), and overlapping the leaves vertically as in the drawing (right).  The leaves on the front of the structure are placed starting at the top and going down overlapping each as you go.  The sides of the structure are placed in reverse, beginning  at the bottom and layering up.  All of the leaves will last without water easily for several days.   It is harder to describe or draw than to do!

I did make rather a production of the base so that I wouldn't have to use a lot of gravel (Accent Decor) to fill it up.  One can always take a LOT of gravel and just fill it up instead of doing it this way!
Base:   12” square tin tray, sprayed black  then a 12" x 12" styrofoam.  Place the base on the styrofoam.   Fill in with torn newspaper strips to raise the level and top it off with 12” X 12” piece of black paper. Finally the gravel...   

At the show, the best laid plans…….
The two triangles did not fit together as well as they should and once the upper one was hydrated the whole design was quite top heavy.  If it didn’t sit straight, the rest of the design wouldn't matter at all.  Wooden skewers held the two triangles together.  Using more padded newspaper to level between the top triangle and the larger one, more aspidistra leaves were then slipped in to cover the gap (whew!).


Would that I had had a step stool when adding the tracery - it was was up high and hard to see the Oasis gap between the leaves in which to put the fragile stems.  On reflection, it was almost like a crack In the pediment that sprouted vegetation.

 “triangle/tracery”


Although I usually resist using a title/intent for my designs,  I used this simple one as my intent.


The camaraderie of designers is infectious in these shows.  We all mumble and stumble and help each other.  Don't you think my fellow exhibitors in the class used luscious plant materials in gorgeous colors  in their designs?


It was hard to photograph these without the distracting backgrounds of the lovely club.  You can see that it was one part of a very lovely flower show.  Congratulations to the Garden Club of Lawrence and the hard-working flower show committee!

Cheers!


Sunday, July 8, 2012

Wired

Metals march down the table


In “Summer marches down the table” (June), glass milk bottles held roadside flowers and created a summery presence down the table.  Here is another design for summery, or other, tables.


For an August luncheon last year, glass tubes and metal wires were fashioned into ‘structures’ for flowers and grasses.  Black-eyed Susan punctuate the roadsides now, but the ones above are a daintier, cultivated variety.  Lily turf grass, Lirope, criss-crosses the design, giving it exuberant movement.


The structures consist of ¼” flat (front right, back) oasis wire (www.jamaligarden.com, www.save-on-crafts.com)and test tubes (www.indigo.com, www.lcmlab.com) on a 18” tray (Jamali again, sprayed copper).   The flat oasis wire comes in 13 colors (is that bad luck?) in a coil 32.8” long. 


 If you want to make several structures, use half the coil for each tray, count the coils and cut the roll in half. Of course if you are making only one structure, use any amount of the wire that suits the tray or other container.


 It is easiest to take advantage of the coils to fashion the wire, rather than opening it up and completely reshaping it.  Above is a first awkward attempt before I thought of keeping the coils and working with them.


Once you have the section, gently spread it along to fit the length of the tray.


The tubes are wired on the ribbon oasis wire. Both of these are Oasis products made from aluminum, come in the same 13 colors (!) and are soft and easily twisted.   Match it  or contrast it, or use another decorative wire altogether. 


Nestle in each tube firmly and attach it to the ribbon wire at two places.  The tubes can be placed at random or uniformly, depending on the effect desired.  I like the idea that the flowers criss cross each other rather than facing in the same direction.

 Fill the trays with stones, glass or moss and place the structure in it.  The water bottle shown is an easy way to fill the tubes, but those spouted condiment bottles work also.  Failing that, any water bottle or small pitcher….


Waiting to be delivered to the luncheon….  All of the trays are copper but some of the wires are copper and some are a wonderful chartreuse green.


Sweet William, Dianthus c, is one of the few flowers that are only available seasonally (May & early June), and so worth the waiting.  They show off beautifully in the structure.  The connecting green is midollino sticks, a fine, very flexible cane (many colors, www.save-on-crafts.com) which has enormous potential for all sorts of arrangements.  Have fun with this, combine colors and shapes, put it on a mirror instead of a pebbled tray!

Cheers!