Friday, September 7, 2012

Mums the Word....


Doesn’t everyone have a back-to-school attitude this time of year?

New pencils, books, crayons……and those darn mums!

Tidy, roundy-moundy little gumdrops for the landscape or doorways, they shout autumn which is why I hate to see them pouring into the supermarkets and nurseries early in August.  I want to shout – not yet!!

As cut flowers they are hard to like, being stiff, uniformly branched and not in particularly pretty colors.  Their best characteristic (or not) is that they last forever!

We will remove those stiff branches and use only their bright faces to create a pattern in a plant saucer or other low shallow container.  In the interests of floriferous research, I counted 45 flower heads from bud to bloom in one ten-stem bunch!

 Any low container, soufflĂ© dish, baking pan or outdoor pot saucer will work.  Just be sure it won’t leak.  This design will last a long time if water is regularly added.

First fill the container with long pieces of Oasis which are the same depth as the container.  You can fill in the open areas as I did on the east and west, or not, as on the north and south.

This design is all about color and texture, not flower form. Biedermeier is a design style which calls for formal lines of flowers which are inserted side-by-side to create the patterns.  Notice (above top) how I angled the longer stems so that the flower heads covered the open space where there was no Oasis.  I used a cup and a bowl to make the circle dents (technical term) in the Oasis to guide me.

This technique is called pave – literally from paving stones, which the flower placement resembles.  I have put a spider mum in the center and allowed it to stand up a little taller than its cousins.

Instead of an apple, what about one for the teacher?  This is in a tuna can.  Maybe you will make them for bedside trays at the local nursing home or hospital?

Cheers!


Sunday, September 2, 2012

Attention Campers Part 3


 flowerflinging Camp seems months ago instead of three weeks.  Campers of every age all over the US have returned home for Labor Day. In a sort of last gasp effort, here are the rest of ff campers' creative images and ideas to inspire you.


This exuberant design is constructed with Oasis placed on top of a candleholder. The pale leaves are dried strelitizia.  As they dry, they form the most fanastic shapes.  The dark leaves are cordyline with a beautiful light edge.


The Nominator made this voluptuous structure from a roll of turquoise aluminum wire.  I won’t go through how she did it here but I will in a later post.  However, I do have a new supplier of Oasis wire:  www.marshallfloralproducts.com   They not only have this but some of the newer widths, up to ½” in many colors.


When The Welder came to ffcamp (see “Attention Campers”, August), many structures were made but there was no time to design with them.  The MOG returned and promptly tried out her welded circle which sits on a little metal plate.  Lots of good tropical stuff in this design -  anthurium, proteas, orchids, grasses and ferns – many of which pick up the warm patina of the metal.  Thanks, MOG, for the photo.

Above is another version of the lantern created by the Editor.  She has used more varieties of plant materials - sunflowers, croton leaves, roses, large and small peppers – in a colorful scheme.

Inspired by Tokyo Flowers by Yuji Kobayashi, Stichting Kunst Boek 2011, I tried to replicate his column of woven palm leaves.  The substrate is a rolled and glued column of stiff paper with an opening made for fresh plant material.  I wasn’t happy with the final result – there is a reason they are the masters! – but it was an interesting exercise to try.

Their bags packed & the cars loaded, the last structure for the campers was to inaugurate my pergola construction.  Each camper has some willow that they wove into the frame. 

Cheers!

Thursday, August 30, 2012

Don't kiss the flower frog...


Don’t kiss these frogs….not one Prince will appear.  Before the invention of Oasis floral foam, flower frogs of all sorts were the beginnings of every arrangement. In the 1920’s, 30’s and 40’s, these holders for the stems of cut flowers often took fantastic forms and were as pretty as the flowers themselves.
Stems were inserted in the holes provided.  Although some of them actually were frogs, they all were called frogs because they sat in the water.  They were made of ceramic, metal and glass and can be found on Ebay, Etsy and other sites.


Today’s utilitarian pin flower holders have many sharp needles on which to impale a stem.  They, too, come in many shapes and sizes.   Some above have a cup to hold the water.  The plastic one, right front, has suction cups so it can sit in a tight spot.


These lead holders were wonderful gifts.  Artistically shaped into bouquets of wonderful leaves, they are made of lead and very heavy.  They have neither individual holes or needles so the stems slip into the spaces between the leaves which is excellent for tulips or other bulbs and branches which don't like to be in oasis. 


Why not let them take center stage and do the work (see "The vase stands alone" July)?  I have placed them on an asymmetrical steel tray that is deep enough to hold some water, allowing one floating gardenia to fill the air with that amazing fragrance.


Substituting clematis for the gardenia allows the vine to move among the holders.  This close-up shows the turtle holder.  What would fit in that?  Hyacinth or other fat stems?

Moving everything to a large celadon shallow bowl (invaded by an iron bug),  I have used the beautiful patterns of coleus leaves to create some rich color.  They look even more beautiful underwater which makes the color sing.

Sometime I will try and kiss, er, use the frogs for flowers!  

Cheers!


Sunday, August 26, 2012

Mixed Bouquets, mixed results....


It is fascinating to think of the huge quantities of mixed bouquets that are sold daily at corner stores, supermarkets and farmers markets.  Most flower stands have two to three times the number of mixed bouquets to bunches of one flower which attest to their popularity.  I expect that most shoppers take them home and put them in a vase just as they come out from the cellophane. 


This group at Grand Central station for $42.99 a bunch must be the Cadillac of mixed bunches.  Looks to me like 4 large callas, some purple statice, 4 red roses, yellow button mums, 3 godetia and a large lily (only in bud here).

At the grocery store, I recently purchased ($8.99) the mixed bouquet above to harvest for the cockscomb (reds and oranges looking like brain coral) and the gomphrena (pink and white gumdrops).  Thinking they could dry in the arrangement as well as not, I challenged myself to make lemonade from these, albeit, colorful lemons.


Taking apart the bouquet, it resolved itself into:  3 stems of willow celosia pink, 2 mini sunflowers,  5 stems of mixed cockscomb, one orange gladiola, one white gladiola, and 6 stems each of the pink and white gomphrena. 


I chose a honey bee ceramic container and reused a piece of oasis that I had kept hydrated in a plastic bag.  OK so the direct ratio of my interest in mixed bouquets is in proportion to reuse of oasis!!  If you want to reuse oasis, you must have a piece like this which has very few holes (technical term) where stems have been placed.  The oasis must not dry out.  It can be frozen(!) or kept in the fridge.  Be sure that any flower stem goes into 'fresh' oasis not where there is an air channel from an old stem. 

This post is about color so I won’t get in to the problems of the scale (size) of the flowers.  I chose the modern mass style (see “The Pastels of June”, June for the anatomy of a modern mass arrangement). First, I had to solve the problem of the two sunflowers looking like big brown eyes!  To cope with that I kept them together but at an angle to each other so you really didn’t see them side by side, so no 0|0!  Maybe one brown eye at a time is slightly better?


Continuing the groups, the muted reddish cockscomb was clustered around one side of the sunflower, with other colors continuing around.  Using toothpicks in the cockscomb stem helps hold them in place, acting as a fulcrum.

The single orange gladiola was cut into two pieces and placed together to make a cluster, placed close to the warmer red cockscomb.  I tried to keep the purpley-pink together out of sight of the hottest colors.


The pink gomphrena were placed near a more subdued cockscomb color and the white gladiola was also cut and placed as a cluster. No matter what you do with the white it acts as an eye grabber.

By using the materials in clusters, the groups appear more as the same size rather than tiny gomphrena dots with a large sunflower.  Finally, I placed the wispy willow celosia in a cluster at the top.


Not ideal, and the worst was that when I returned home after a few days, the whole thing had been thrown out. My crop saving will have to begin again!

Cheers!

Thursday, August 23, 2012

Attention Campers Part 2


Attention Campers Part 2


At flowerflinging Camp this month, we focused on structures.  Each camper came with a structure or two to try out or with the materials to make it from scratch.  These diverse designs inspired us all!

The Nominator was making this plexiglass structure for the second time.  The curve and tension are created by tightening the burnt siena twine until you have a balanced curve.  Ha! Easier said than done. There are two rows of holes at each end of plexi and it is strung rather like a cat’s cradle.  Plexi flower tubes are also covered with the twine.  They are inserted between the interlocking twine and look like gorgeous orchid ice cream cones!  The looped lily grass adds elegance and rhythm.


The MOG brought this versatile wooden structure with a rotating panel at its center.  You could not ask for more beautiful harmonious plant material which includes anthurium, orchid, phormium calla lily, ti leaves and leucadendron.  The elegant design sweeps diagonally down the structure.


Lady S resurrected her structure that appeared in “The Fine Art of Flower Arranging” (Abrams, 2002).  Using twisted Manzanita branches and spectacular home grown lilies – (Lilium Scheherazade, an oriental trumpet lily), Lady S created a lively counterpoint to the symmetry of the structure.


A battery lantern was cleverly used as a design structure by The Editor.  She created a very flowing line design in a simplified the color scheme of yellows and green, using croton leaves and mini sunflowers, linked by variegated phormium and middolino sticks.  Middolino sticks are a very fine flexible cane and come in many colors. 


In the first ffCamp post last week, you could see this plexiglass sheet being bent with the heat gun used for paint stripping.  After making a number of graceful curves, the Grower used this as the basis for several groups of materials.  This gorgeous one combines orchids, phormium, variegated aspidistra, alligator fern, birds nest fern and small green button mums called Kermit.  The placement of the flowers echos the waves of the structure.   

Thanks to The Editor for the photographs......Still more camp to come....stay tuned!  
Cheers!


Sunday, August 19, 2012

The Last of the Watermelons


Flingingflowers celebrates food.  


Can a recipe be both successful and unbelievably easy?  This one is!  This recipe was shared by my former neighbor and makes a beautiful, delicious summer hors d’oeuvre.  


A quarter of a seedless watermelon makes plenty for ten or more.  Seedless watermelons actually do have seeds, of course, but they are tiny and soft.


Besides the watermelon, you will need white rum, a lime for both zested peel and juice, and coriander.


It is so easy to cut the pieces.  First slice down towards the rind in one inch slices. Then, slice along and just above the pale rind – East to West. 


I don’t bother to make squares as it will waste too much melon.  Although the seeds are edible, I do try and remove the ones I see in case they put people off. 


In a bowl, mix together the rum, lime peel zested and lime juice plus chopped coriander, then add the watermelon chunks.  Can be made in the morning and refrigerated. 


Who doesn't like this gorgeous color?  It is a refreshing change of pace from cheeses or raw vegetables.  If you don’t want to use the rum, I’m sure it would be tasty too.  The coriander and lime are flavorful by themselves. Do give it a try before the watermelon disappears for another year – and let me know if you like it.

Cheers!

Thursday, August 16, 2012

flowerflinging Camp

Attention Campers!

2012 flowerflinging Camp


Structures was the theme of the third annual flowerflinging Camp held at The Barns this month.  Six friends, GCA judges all, came to the Berkshires for  flowerflinging, fun, friendship and food.


As in every good camp, we had a library where we shared our favorite design books and magazines.


A photo studio to record the fun.


ffCamp is about sharing techniques, skills and experiences.  Usually no single person is the teacher.


We worked with paper, plexiglass and wire, with sticks and frames and even repurposed lanterns.


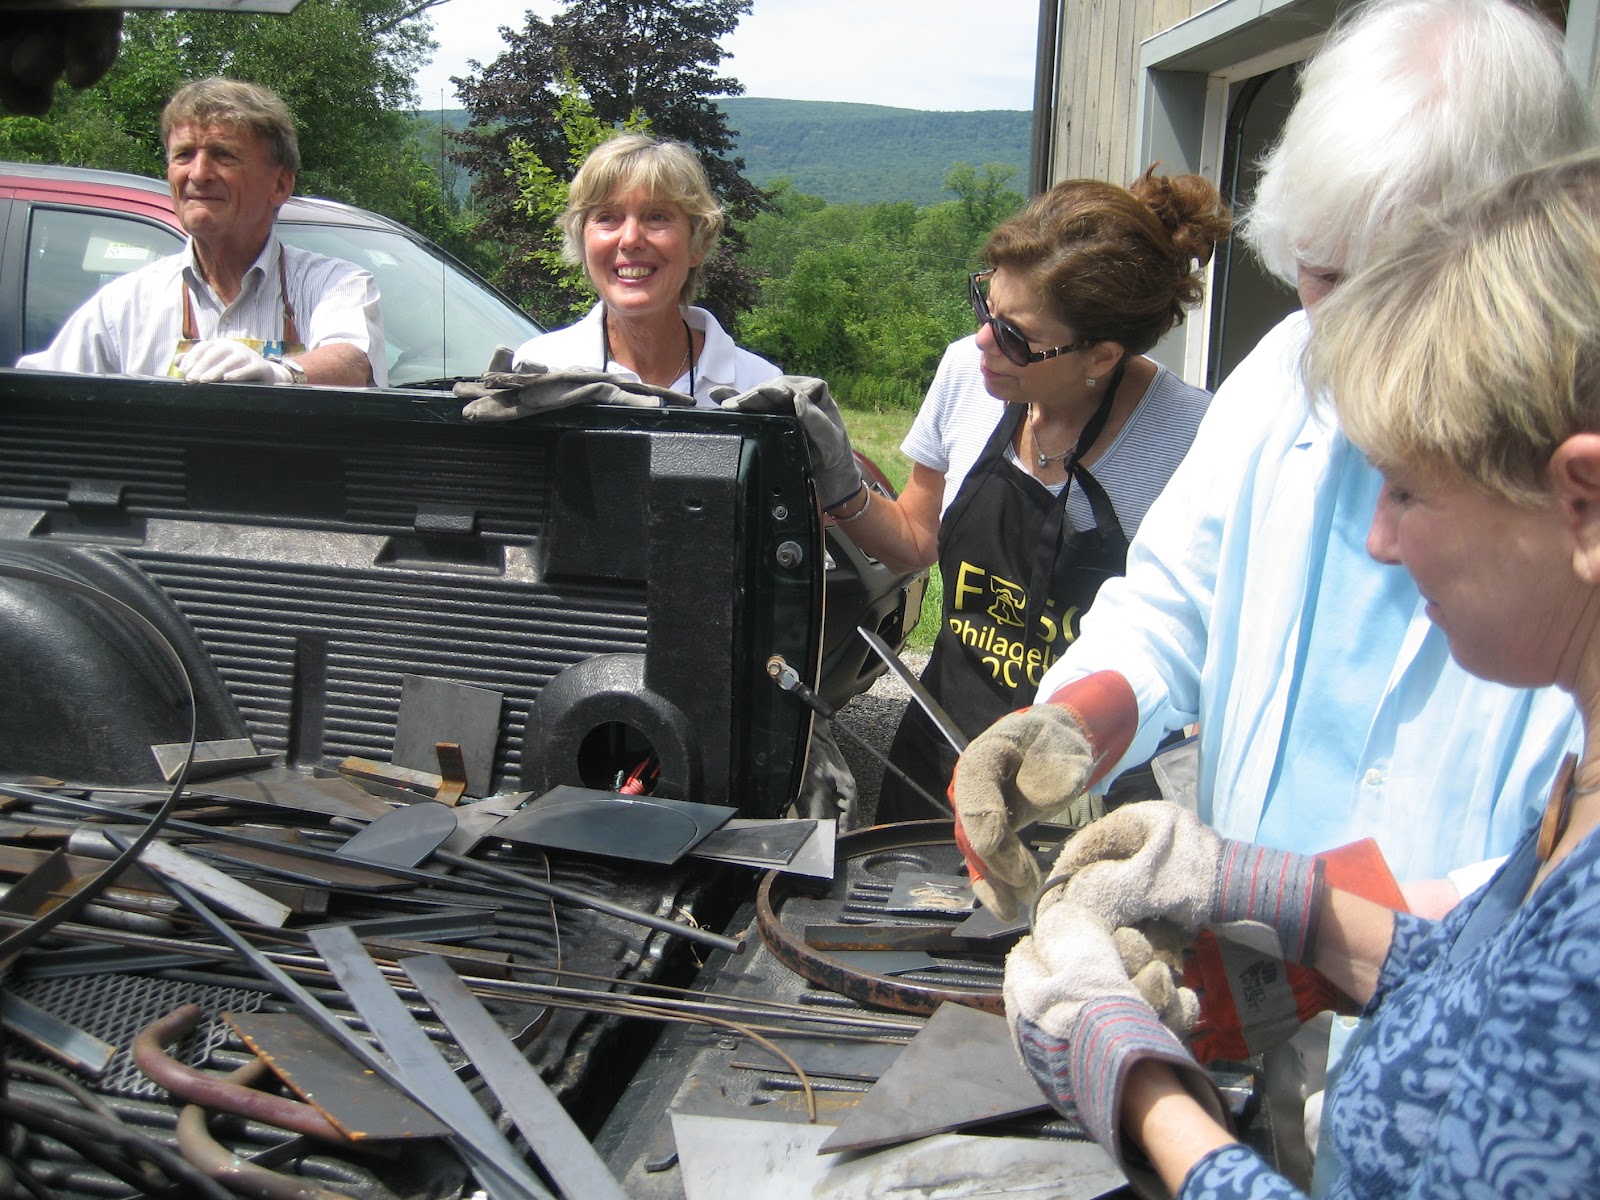
Most fun of all was when we did have a visiting teacher, The Master Welder and Mrs. Welder, along with Mr. GCA as sous-welder.


The Master Welder came with his traveling equipment and a truck bed of metal scraps of every kind, plus welding 'masks' for each of us!  


 We were delighted to choose scraps and have them fashioned into stands, containers and sculptures. A drawer in the garage yielded enough gloves for all to us - the scraps are sharp!


Judges Commendation to, left, Mr. GCA and right, The Master Welder, "for unlimited patience and great good humor with the campers".  You can see the great variety of structures created at ffCamp. Those interested in welding should read the chapter by Margo Paddock in The Fine Art of Flower Arranging by Nancy D'Oench, Abrams, 2002.  

Thanks to Mrs. Welder for the photographs. To be continued -- with the completed designs and tips…..

Cheers!